Showing posts with label Tim Holtz. Show all posts

Sunday, April 26, 2015

Tim Tag~April 2015~12 Tags of 2015

Happy Sunday!

Hope you had a fabulous weekend!

I made some time to finish up my April Tim Tag. Yay, done before the end of the month, hehe.

It was another improvise project, not having all the supplies used on his tag. You can see his awesome step by step HERE

I love the improv, definitely makes ya think!

Here we go, please click if you would like to see it bigger:)


I cut my tag from a manila folder. I inked the edges with Walnut Stain Distress Ink then splashed with some water.

I used two flowers from Inkadinkado that have stems sorta on the long side, the only ones I own. I used various Distress Inks to watercolor them.


I am really enjoying using the Remnant Rubs for my words and sentiments lately. I used a Tim butterfly die to cut out the smallest one on the word band.

I really love the simple vintage-feel tag this month. So fine and fresh for Spring. I really loved cutting the slot to pass the image sheet through. I will try to remember it and do it again...


Have a super wonderful week and thanks so much for stopping by!

~hugs~

~kim

Playing with:

I am also entering this into the Simon Says Stamp, Wednesday Challenge: Clean and Simple
Inspiration Emporium is also running a wonderful :Everything Goes Challenge for April 

Wednesday, April 1, 2015

April 1~New Challenge Mixed Media Mojo~Recycle/Upcycle: Twist Flowers~ CC3C #25~Rhedd's

Welcome April!


April what a fun day for so many reasons! No jokes...well at least not yet....

Today starts a fun new Challenge at Mixed Media Mojo! The theme is Recycle/Upcycle with a twist, Flowers....make of it what you like, just have fun and please share with us, we love to see your creations!

And a big joyful WELCOME to all of our new DT members! Please hop over to leave them some comment love:)

                                                         Click HERE to join the Challenge:)

Here is my project to share for your inspiration(hopefully!)


It started this clothing life as a wonderful shirt with cherries....


Then was transformed to a Springy canvas! The above picture I used flash on and it is still a bit harsh. In person it is much softer. I was impatient and rushed my photos...then I made more in the soft morning window light...


The butterfly is a Unity stamp, my current favorite. I stamped it onto a book page in Jet Black Archival. I colored it using Distress Inks, Wild Honey, Spiced Marmalade and Barn Door progressively. Once done I used my water brush to further blend the colors. Then of course the paper rippled...but I like how it made the butterfly have movement..magic!


Distress Paint and my Tim Rays stencil for the sun shiney fun.

I die cut the trellis using my Tim Frameworks die. Wonderful tip, there is a Challenge featuring the use of these dies, HERE. It is the Compendium of Curiosities Vol 3, Challenge hosted by Linda. This one is sponsored by Inspiration Emporium with a super wonderful $50 shopping spree!


You can start to see it here, more of the background layered in with stencils, stamps and mini stamps.


Please click pictures to see any bigger if you like :)


And the flowers:)  I love paper flowers! I made these using my Tattered Florals die. I used magazine pages with various imagery. Some of them are pictures of flowers.  I used the brads to hold the layers together. They were too flat and bold....so I crunched them up.


Then I sprayed them with Distress Stain Spray and splattered them with Distress Paint. I love how the  spray stain and paint made them more translucent quality. It really toned down the bright magazine imagery!


I am also entering this in the wonderful challenge hosted by Linda, the Compendium of Curiosities Volume 3, Challenge #25. If you are not sure what this challenge is, it is to follow along with Tim's book of techniques. This fortnight's features the Frameworks dies. Each Challenge has some wonderful prizes. This one has a chance to win a $50 gift certificate from Inspiration Emporium, hope you will visit the super shop HERE.

Another wonderful place to share your Mixed Media/Altered Art is at Rhedd's Creative Spirit. It is always Anything Goes as long as it is not a card, ATC or scrap page. The DT's art is wonderful and all the makes shared are amazing, do hop over and visit! I am linking to the April Challenge.

Thank you for following along!  Sharing the fun with Mixed Media Mojo, our April theme is Recycle/Upcycle, twist, Flowers.


Happy April!
~hugs~

~kim

Wednesday, March 25, 2015

Tim Tag~March 2015~Butterfly~12 Tags of 2015


Yay! I have my Tim tag done before the end of the month!

Love the colors, super bright and fun, bit of sparkle! I am really happy with the way it all came together. Perfect for Spring and March!

Make sure you hop over to see the wonderful walk thru on Tim's blog, HERE.

Please click each photo to see it bigger.

I included several pictures, I love how the slight angle change alters the colors :)


I used the Dot Fade stencil with texture paste. The butterfly stamp is Unity, I don't have a Tim one...yet :) It is on my wish list for sure!

Enjoy your day!

~hugs~
~kim

Also sharing and supporting the following challenge:
Inspiration Journal, March Challenge: Spring Blooms

Monday, March 16, 2015

DominoArt~Harlequin Altered Playing Card


There is a super fun challenge blog that features altering your favorite game pieces! Each month the lovely hostess, Leigh, has a new challenge. The March theme is to incorporate the harlequin diamond pattern somehow with your altered game piece.

Please take a bit to hop over and share and support this wonderful alternative challenge blog, you will be pleasantly surprised! You can hop with this link, HERE

I love the Tim Holtz Harlequin stencil and embossing folder. I still need the stamp to complete my trio! So when I saw this challenge it was too fun to pass up! Plus,,,as I am sure you know I love altered playing cards! yay!

Please click to see a bigger photo:)

I embossed a piece of manila folder with the Tim harlequin folder. I inked the folder with Black Soot Distress Ink then passed it through the machine. Once dry, I stamped it using Potting Soil Archival and a Unity Chicken Wire stamp.

I die cut the fleur de lis from the manila folder. I stamped a separate fleur de lis from the same Tim set and heat embossed it.

The red flower is die cut and inked with Festive Berry Distress Ink.

This is the backside of the card. It is a deck actually used in a Casino, that is why the corners are clipped. I found this deck at a dollar store.


Have a wonderful day! Hope you have time to stop by and say Hi to Leigh!

~kim

Sharing with and supporting the March Challenge:Harlequin, Any Game Goes at DominoArt

Saturday, February 28, 2015

Tim Tag~February 2015~12 Tags of 2015

Hi!

Today I just wanted to share the tag I made for Tim's 12 Tags of 2015.
This was a lot of fun to make and I did some improvising along the way, making what I have on-hand, work for the project. The is actually the most fun part sometimes :)

You can see all the lovely entries and the challenge HERE at Tim's blog.

And this is my entry. I hope you like it!

Please click the images to see it a bit bigger:)


To make the collage base, I made up my own ephemera using a couple of 12x12 sheet of Tim Holtz paper. I picked images that I liked, clocks, kitty, the bingo cards are fun not sure why I love them but I do :)

I used matte medium to adhere the pieces to the tag and a thin coat over the top to lock it down. I really like how it dried so soft and non-tacky.


I used Picket Fence Distress Paint along the edges and across some parts to lighten it up, parts seemed a bit dark. Once dry, I added another layer of matte medium. Once this layer dried, I darkened the edges, love how it brought in more depth!

I cut the heart from felt using a Sizzix mini heart movers die. I attached it using the Idea-ology long fastener. The crinkly ribbon I colored with Distress Ink Tea Dye one of my new favorite colors.


I cut the flower using a Holtz Tattered Floral die from metal tape. I embossed it with the chicken wire folder. It is painted with Black Soot Distress Paint.  I used some Holtz Rub-ons for the arrows and "choose joy". I love polka dots so I had to include them somehow. This dotted ribbon is actually seem binding.

I am really happy with this tag, I love how it came togther.

Anxious to hear what you think, too!

Have a super day!

~hugs~
~kim

Thursday, October 23, 2014

October 23~ 31 Days of Halloween Wicked Blogger Challenge Day 23~Danza de la Muerte

Hi Happy Thursday!

Welcome to Day 23 of 31 Days of Halloween! The Smeared and Smudged 31 Days of Halloween Challenge is to create a daily project using a stamp, rubber or digi, and run from there. Remember to pop over HERE to Terra's blog to see the daily Scavenger Hunt prizes donated by our awesome sponsors and find the daily clue. You can also see all the rules there, too. For your reference I have the Wicked Blogger Hop list on the ride sidebar:)

Today's exploration comes from more banner play. This time I fell in love with a banner project made by Diana Trout and it was on her post and contest that I won the set of the ArtistCeller stencils, Danse Macabre. I used one stencil on a tag earlier in the month HERE


Click to see it bigger if you like:)

I made a long post....I hope you don't mind! 
Warning TEXT and PICTURE heavy!


I made the banner using deli paper, the same paper they use in sandwich shops to wrap up your sandwich. It is sold in the restaurant supply shops. I found some here at Smart & Final, a box of 500 sheets for about $8. It is called dry wax paper. 


I love how the light and shadows play here:)


I used Distress Paint right on my craft mat and sprayed with water. Then I pressed the deli wrap into the paint and pulled it slowly off. I made a lot of sheets, so fun to play.

Once dry I picked out the sheets I liked the best and tried the papercutting. The papercutting is just like cutting snowflakes! Fun!

Once done with cutting, I placed the dancing dead stencil where I wanted it and sponged on acrylic paint. I added more flowers using an Inkadinkado flower stamp dipped in Distress Paint. If you use paint on your stamps, make sure you wash them off as soon as you are done stamping:)


Now I wanted it to be more, lots more festive. I knew I wanted ribbon and flowers. I had ribbon that was easy. I don't have a flower stash and I really like using what I have on-hand. Besides, handmade is so much more fun.


There are lots of sources of how to make paper flowers. The easiest one is to cut up a bunch of flower shapes or even circles in whatever size you want. You can use any sort of paper too. Book pages are lots of fun.  Just cut up a bunch all basically the same size pieces. You can use a paper punch, freehand it, or use a flower die if you have a die cut machine.

I used my Tim Holtz Tattered Florals die and cheap tissue paper I had on-hand. I folded and re-folded the tissue till I had a lot of layers then placed it on the die and cut. Bit easier on the hands to do them this way.


I used the smallest flower in the set as I wanted the flowers to be close to a Marigold.

Take a stack of the cut "petals" and staple them in the middle. You can also use a brad if you like. Now starting with the top layer, gently pull it up and crunch it up, ruffle it. Proceed through each layer until they are all ruffled. It will be like a tight bud when you are done, so just ease them apart until you have the shape you like.


Along the way I found out the flowers that I had not pulled carefully off the cutter, (I dropped them all over the place) ruffled up much closer to a Marigold. The ones with all the layers aligned are still awesome but a totally different look!

I used the Dylusions spray to get the orange flowers since I did not have orange tissue. I like to spray outside on cardboard 'cuz I am a messy crafter and well the spray ink kinda goes all over.

Long winded, but I really love these flowers and wanted to share:)


Dance like no one cares!

Thanks for all your awesome visits and such wonderful inspiration to play and craft away!

~hugs~

~kim

Sharing this with the flash linky party at Stamplorations: HERE


I am entering this into the Simon Says Stamp Monday Challenge:Anything Goes
And I am entering this into the Mixed Media Monthly October Challenege:Ribbon

Tuesday, October 7, 2014

October 7~ 31 Days of Halloween Wicked Blogger Challenge Day 7~12 Tags of 2014

Happy Tuesday!

A sweetly spooky tag today this 7th day of October! 7th project in 7 days for the Smeared and Smudged 31 Days of Halloween fun! If you need the details, pop over to Terra's blog HERE

Should you need a refresher for the Blog Hop, it is right there under Mr. Neon Skele on the right sidebar. Thanks so much for all the enthusiasm in your comments, sooo appreciated<3

I know you all are super busy and so let's just Hop to it! Off we go....

Boo! My inspiration was drawn from Tim Holtz and his 12 Tags of 2014 October Challenge :)

Please click each image for a larger version:)


I have a manila tag, plain then transformed! I stamped the black cat and spider and embossed them in black, following Tim Holtz 12 Tags of 2014 October make. Then I cut a mask for each, once the tag cooled, I used Tim's Dot Fade stencil and applied texture through the stencil and over the embossed images.


The skele kitty is another stencil from the Danse Macabre stencil set by Beatrice Coron. I just wanted the kitty portion this time around, so I only applied paste in that area.


Now let the paste dry.....while waiting I stamped the pumpkins with Jet Black Archival ink.


Then colored them with Distress Inks and water brush. Once dry I added Glossy Accents to the colored portion for a bit of dimension.

Once the paste was dry, I added some Distress Ink though stencils at the bottom, the diamonds and blocks then clear embossed them.

That done,  I misted the whole tag with water. Then I used Dylusions Spray inks to play. I love the vibrant color! I sprayed and blotted until I was happy with the pattern.

Cut out the pumpkins and adhered them to the surface.

Thanks so much for your visit!
~hugs~

~kim

I am linking to Tim Holtz ongoing challenge: 12 Tags of 2014 October 
I encourage everyone to pop over and see all the wonderfulness!

Tuesday, July 8, 2014

Tag~ ChitChat~Shake It!~SimonSaysStamp Wednesday

Hey There,
Happy Tuesday!

I hope everyone had a safe and fun 4th if you celebrate the day and a fun relaxing weekend never-the-less!

I saw the prompt posted last Wednesday at Simon Says Stamp, Wednesday Challenge to Shake It. It sounded so fun and different for me. A really cool prompt. Well...the idea was in my brain that I wanted to do something and I was patiently mulling it over in my brain and struggling to ignore all the can't dos and must dos that annoying inner voice possesses. Now so impatiently waiting for that A-HA! moment when I could pull it all together...

Fast forward to this morning....yes I seem to create, work, (have more fun) with a deadline looming!.....I came across a blog post about upcycling packaging. This one at ArtistCellar to reuse the plastic bubble that holds an object onto a board backer card. A-HA! finally the thing to hold the shaker stuff and without spending anything new!! Yay!

Thus this tag was born, it is very young, be kind! I have always loved the clear acrylic 'wands' filled with oil and glitter and various treasures to eye-spy! This is my tribute to that mesmerizing toy:)


A simple tag with distress paint, embossing paste, fancy tape, stamped stained tissue, all mounted on a manila tag for extra support for all the shaking!


I used the Tim Holtz ChitChat stickers and edged with Distress Ink for the words and Distress Glitter for the sparkle! The tissue is small bits from the stained tissue I stamped the stamp and time companion sentiment onto.


Thank you for looking! I hope you like it:) Find me playing at 


Thursday, June 5, 2014

CC3 Challenge #3 ~Faux Tea Rose~Let Your Dreams Fly~June 5 2014

Greetings! I hope you are having a lovely day this day:)

It has been just about two weeks already since the last project in the Tim Holtz, "Compendium of Curiosities Volume 3" Challenge hosted by the wonderful Linda Ledbetter! Do take a look there at all the amazing projects and beautiful blog. Best part is, you can join the challenge any time! Just order your own copy of the guidebook from Tim Holtz here and he will autograph it for you, too!! Then follow the prompts which are posted each two weeks til we make our way through them all. I'm learning tons already!

This is an odd numbered challenge, so it is sponsored by the Inspiration Emporium and they are offering a $50 Gift Certificate to a  random lucky entrant! So cool and generous, thank you!! There is also a super cool prize pack donated by Tim Holtz and Mario Rossi to be awarded by the Curiosity Crew!

For this challenge we had to use a specific die and transform it into a lovely rose. Don't worry, grab your copy of the book to see how! It was my first time trying this technique and after a couple of tries I think I got the hang of it. It is so fun!

Well, here I go! Below is my entry for the Faux Tea Rose Challenge sponsored by Inspiration Emporium. If you are curious, my supply list and process is below the pictures:)


This is my project, "let your Dreams fly". The garden is such a fun and relaxing place to enjoy and seek inspiration! I have roses and garden critters with a twist:)


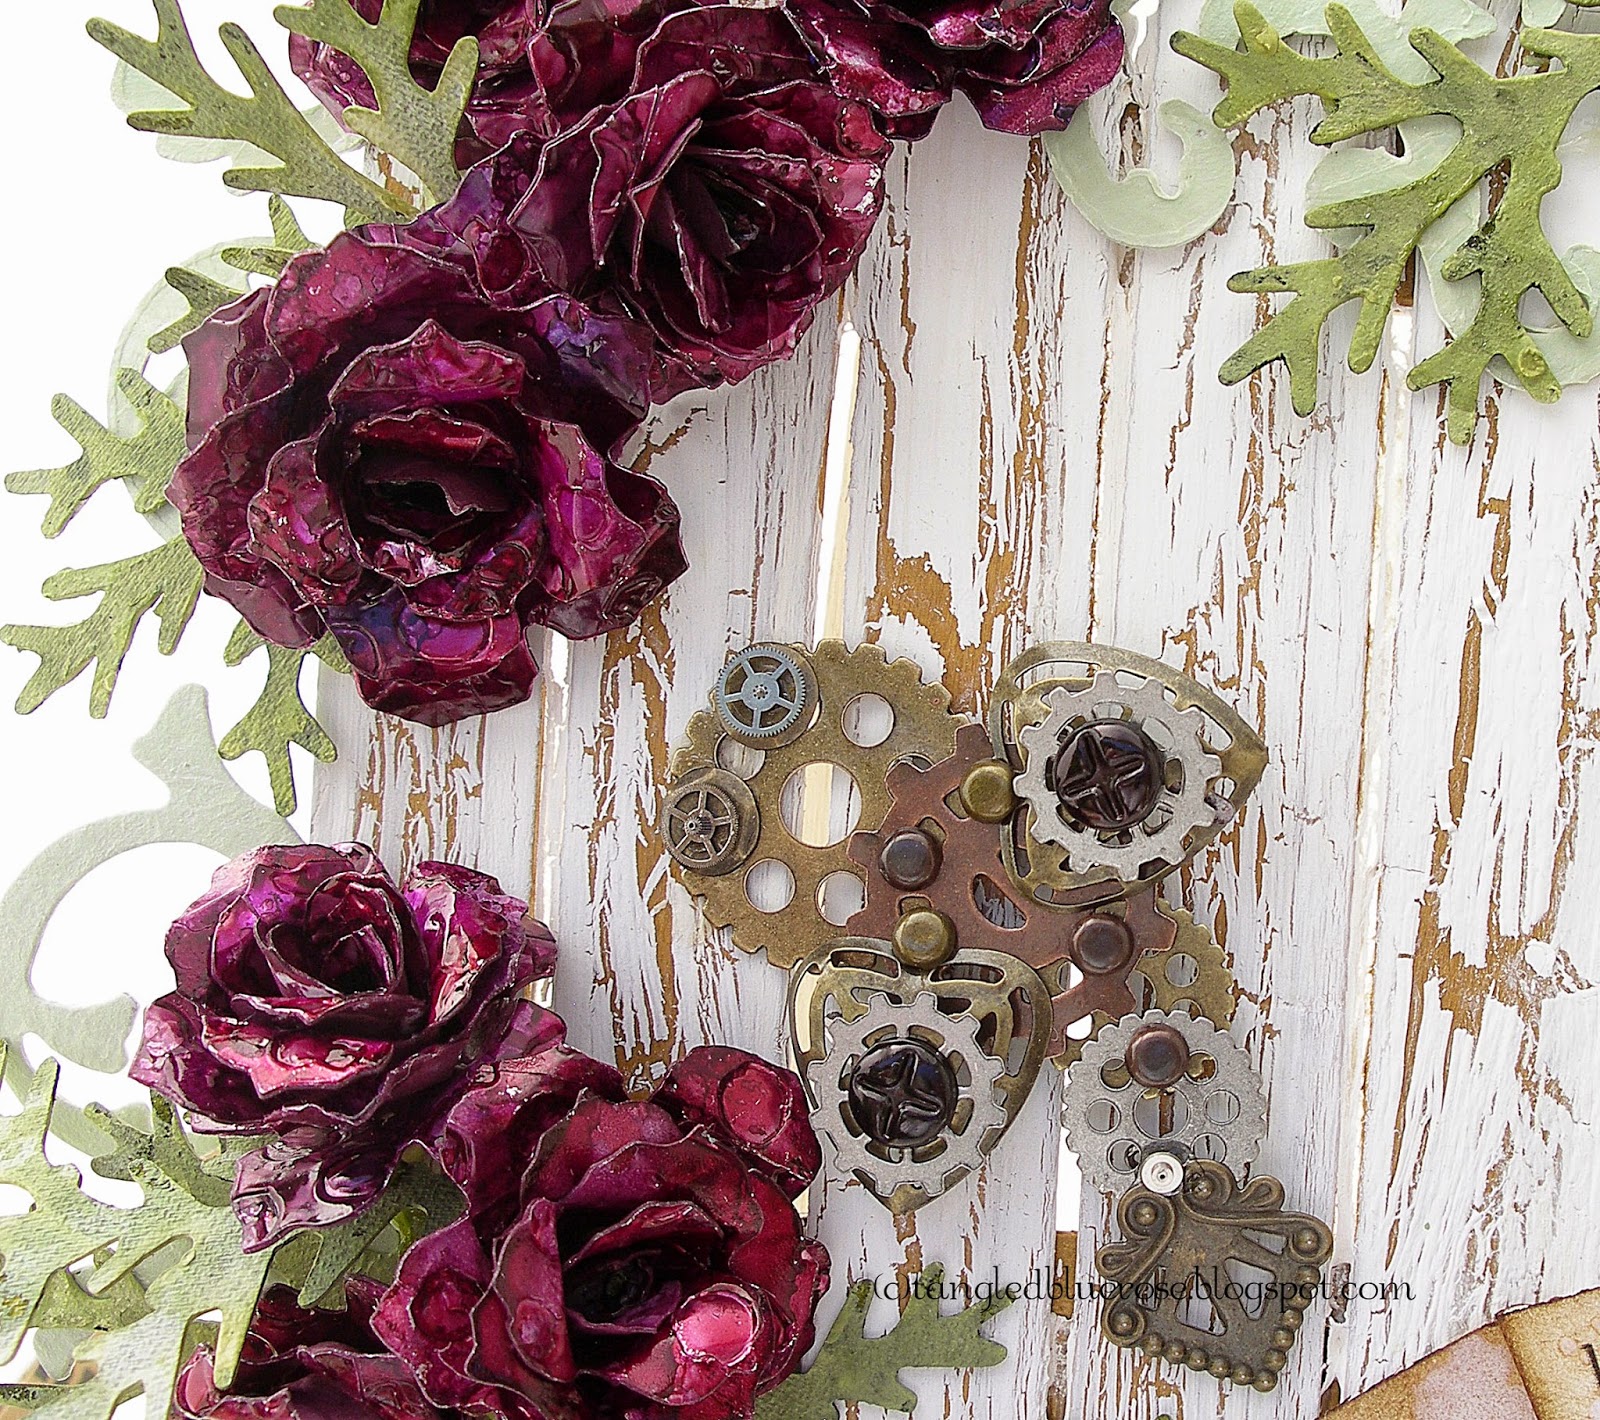
My roses were made with air conditioning foil tape bought at the hardware store. Gardens should sparkle right? I attached the tape to cardstock then die cut it. After that I embossed the cuts using the honeycomb and bubbles texture fades. I added alcohol inks to get the yummy deep color! I LOVE the foil tape and inks, they are so far among my favorite 'stuffs' to play with:)


Next my magical buggies! My next favorites, gears and cogs, no wonder I love all things Holtz, right :) !! The mini fasteners work great here too, so many uses.


My lovely dragonfly checking things out! The rose vine is painted with distress paint on top of gesso, I wanted a grainy distressed look. The fern-like leaves are also gesso covered then painted with Distress Stain, again the get the fading and brights all at the same time. Everything is mounted on my self made 'fence': constructed from popsicle sticks with more distress, can't have too much distress!

I really love how the roses change color depending on the angle of view. It is a fantastic quality in the foil tape and alcohol inks.

Steampunk roses and buggies, a wonderful place to let your dreams fly.

Please leave me a word (or three) on what you think:)


Entered/Linked into the:
CC3 Challenge 3 Faux Tea Roses

The piece also works well for the wonderfully open challenge held at Simon Says Stamp: Monday "Magic" theme.
SimonSaysStamp Monday Challenge: Magic, Alcohol Inks on metal, magical<3 Gear & Cog Buggies<333